
DIY and decorating at home encompasses very different realities: installing a wall shelf, repainting a wall, replacing a floor covering, or rearranging an entire room. Each DIY and decoration project requires specific skills, tools, and a regulatory framework. Before rushing to the store, some technical guidelines can help avoid costly mistakes and aesthetic disappointments.
Energy renovation and DIY: the regulatory limit to know
Many decoration projects intersect with the issue of thermal performance. Changing a window, doubling a partition, or insulating a wall from the inside alters the energy balance of the home. By 2026, energy renovation work that receives assistance must be carried out by a certified RGE (Recognized Environmental Guarantee) company. Households that undertake this work themselves cannot benefit from the associated subsidies.
This constraint impacts budgetary decisions. Insulating an attic oneself is cheaper in terms of labor, but it forfeits access to financial aid. For a project that affects the thermal envelope of the home, it is better to estimate both scenarios (self-renovation without aid and RGE professional with aid) before deciding.
The timeline for the energy performance diagnosis (DPE) reinforces this issue. Since January 1, 2025, homes rated G are considered unfit for rental, and those rated F will follow in 2028. Resources like bricodeco-solution.com help combine decoration ideas and technical constraints to better anticipate these obligations.
Site preparation: basic steps and tools
The success of a DIY project relies less on the execution than on the preparation. A poorly anticipated site leads to duplicate purchases, shoddy finishes, and extended timelines.
Define the exact scope of work
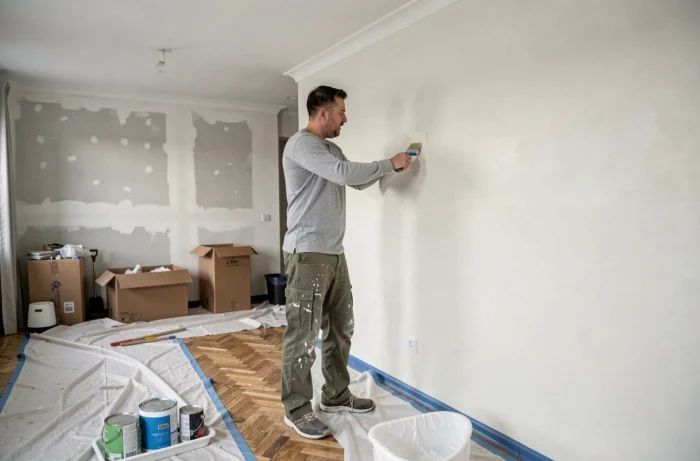
Before touching a tool, list the operations precisely. Repainting a wall involves filling holes, sanding, applying a primer, and then two coats of paint. Each step has its own materials and drying times. A well-defined project in stages avoids most errors.
Assemble a suitable tool kit
Accumulating expensive tools without knowing how to use them is pointless. For most decoration and interior design projects, a limited kit is sufficient:
- A cordless drill-driver, which covers shelf installation, furniture assembly, and drilling into light masonry with the right chuck
- A bubble level or a compact laser level, to ensure the horizontal alignment of wall elements (frames, shelves, backsplashes)
- A tape measure, a precision cutter, and a set of flat and Phillips screwdrivers, which are used in almost all DIY operations
- A set of brushes and rollers of various sizes, complemented by quality masking tape for clean paint lines
Investing in low-quality masking tape is a false economy: it allows paint to seep under the edge and requires touch-ups.
Wall decoration and layout: balancing cost and durability
Wall decoration encompasses a large portion of projects accessible to beginners. Paint, wallpaper, decorative plaster, wood cladding: the options are numerous, but their constraints vary.
Paint remains the quickest lever to transform a space. The choice of finish (matte, satin, glossy) influences both maintenance and aesthetics. A matte finish hides wall imperfections but is hard to clean in a kitchen or a high-traffic hallway. A satin finish offers a good compromise for living spaces.
Repositionable wallpaper is an interesting solution for renters. It can be applied without traditional glue and removed cleanly at the end of the lease. Its cost per square meter exceeds that of standard paint, but it avoids the need to restore the surface upon departure.
Wood cladding and decorative battens
Wood battens placed vertically on a wall create a highly sought-after relief effect in interior decoration. This technique requires few tools (miter saw, mounting glue, level) but demands precision in spacing. An irregular gap between the battens is immediately noticeable and ruins the visual effect.
Before gluing or screwing battens, check the nature of the wall. A drywall requires appropriate anchors if the battens need to support weight. A stone or solid brick wall requires drilling with a concrete bit.
Garden and balcony projects: adapting DIY for the outdoors
Outdoor projects (garden, balcony, terrace) follow specific rules. Materials must withstand weather, UV rays, and temperature variations. An untreated wooden piece placed outdoors will gray in a few months and degrade within two or three seasons.
Palette wood, very popular for DIY outdoor projects, poses a health issue often overlooked. Some pallets are chemically treated and are not suitable for food contact or garden furniture. Only pallets marked “HT” (heat treatment) are considered safe for domestic use.
For a condominium balcony, check the regulations before fixing anything to the railing or facade. Some condominiums prohibit hanging planters outside the balcony or visible modifications from the street.
Planning remains the guiding thread of any successful project, whether the work lasts an afternoon or several weekends. Checking applicable regulations, choosing materials suitable for actual use, and preparing each step before acting transforms a haphazard DIY into a lasting achievement. The last reflex to keep: for anything related to the structure or energy of the home, a professional diagnosis before work remains the best investment.